CerMark for Metal Marking | Resources
Welcome to the JPPlus Resource Center!
Your resource for support for: Engraving | Sublimation | Toner Heat-Transfer | UV-LED & more!
Metal Marking Basics
Before getting started on metal marking engraving there are a few points and tips to cover. Gathering the proper materials ahead of time and knowing tips that apply to all metal marking processes will save time and energy.
About CerMark Metal Marking
A variety of metal types can be metal marked. While we highly encourage creativity in the laser engraving industry, if you do not see your desired metal on this list, TEST the metal type before attempting to engrave a final product. Engraving a metal not on this list may result in less than satisfactory results and a ruined substrate. It is also a good idea to test any metal you have never used regardless if it appears on this list. CerMark will NOT work on any clear coated or anodized metals.
Metals Approved for Metal Marking
- Titanium
- Pewter
- Aluminum: All 5000, 6000 & 7000 series
- Tools Steel
- Carbide Steel
- Chrome
- Silver - some grades
- Brass - some grades (use a 50+ watt laser)
- Stainless Steel: All 300, 400, 500, 600 & 700 grades
Materials Needed
The following list of materials are recommended for metal marking. A couple of items are noted as optional, but they are part of good practices.
- Denatured alcohol - found in any home centers or hardware store
- Cotton cloths or paper towels - for clean up and spills
- Work area - 2' x 4' is generally a good size space
- 2 Soft nylon brushes - one for applying product and to aide in cleaning
- Running water or cup of water - for cleaning after the engraving
- Latex gloves (optional) - to keep product from contacting skin
- Cardboard (optional) - to place under the substrate to catch unintentional over spray especially when using spray method
Common Methods
Here are a few tips and precautions that are common to all three types of metal marking. Keeping these tips in mind will provide you with the best experience possible.
- Start with a clean substrate. Use denatured alcohol and a clean cloth. Engraving a piece of metal that is dirty or has debris on it can result in a less than sharp image and may also keep the CerMark from properly fusing with the metal.
- Apply an even coating of CerMark on the metal. Apply just enough to not see the metal shining through. "Too much of a good thing" can certainly be the case here. If too much product is applied you may have to engrave over the top of the metal more than once to adequately fuse the CerMark.
- Whenever you are engraving a substrate for the first time a test should be performed. Test engraving allows you to find the optimum settings for power and speed. Not all metals use the same settings. Testing also allows you to see if the metal marking will work if you are trying a product that is not listed in the approved list above.
- CerMark is for engraving (ie. "marking") not cutting. Since this is the case, a raster setting only will be used for all text, graphics and images. Also, with the settings, check to make sure AutoFocus is on or adjust the manual focus for proper placement.
- If the engraving washes off, slow down the engraving speed. The slower speeds increase the heat energy and allow for better fusion. Always use 100% power - always!

If it's good enough for NASA ...
Another testament to the usability and durability of metal marking can be backed up by NASA. Laser marked components using the CerMark process are used on the Hubbell Space Telescope and the International Space Station because they stand up to the rigors and conditions of space and space debris. Now THAT's durable!
Metal Marking in Black
Out of all three formats, the most economical will be the solution. It comes in a concentrated form that will need to be diluted.
CerMark Metal Marking Solution is available in four sizes: 25g, 100g, 250g and 500g containers. It does require dilution with denatured alcohol found in any home or hardware store. Following the dilution ratio table, the product can then be used in either the brush on or spray on delivery method.
Dilution Ratios
- Spray On: 2:1 (2 parts alcohol, 1 part CerMark)
- Brush On: 1:1 (1 parts alcohol, 1 part CerMark)
For brushing, the consistency of the diluted solution should be fairly watery; similar to a latex house paint. It should drip off the brush easily. Use a brush with 1" long bristles for a nice, smooth brushing technique. Since there is more control of the product when brushing an approximate coverage area can be determined. From the 250 gram container, a coverage area close to 2200 square inches can be expected.
When using the diluted solution in the spray-on method, the product should be delivered with an aerosol sprayer, cup sprayer or airbrush, similar to the one shown below.
The Process; Concentrated Solution
Step 1:
Start with a clean, uncoated metal. Remove any oil or grease with denatured alcohol.
Step 2:
Thoroughly stir and mix the CerMark solution. The active ingredients will settle to the bottom of the container. If necessary, dilute the CerMark solution with denatured alcohol.
Step 3:
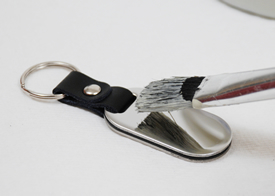
Brush the CerMark solution on the metal. It is better to apply a medium and consistent coating rather than a thick and heavy coating.
Step 4:
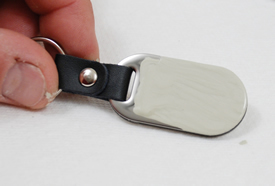
Allow 15 - 20 minutes for the coating on the metal to air dry. Once dry, the CerMark is dry, it will turn a light tan color. Be patient and allow it to dry fully or the bonding process will not work properly.
Step 5:
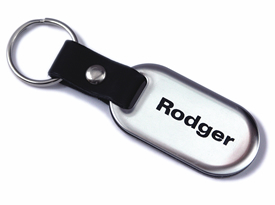
For engraving, ALWAYS use 100% power. Use a speed setting equivalent to your laser's rated power. For example, if you have a 25-watt laser system, use a speed of 25%. If you have a 50-watt system, use a speed of 50%. If you find the CerMark not adhering keep lowering the speed. Do not go below 5%.
Step 6:
After engraving, wash the unused coating off of the metal using water. A soft brush or paper towels help to speed the cleaning process.
CerMark Spray Can
The CerMark Spray is probably the easiest format of CerMark to use. It comes in a ready to use can. No diluting or guessing is needed. The spray can comes in a 12-ounce size. After a thorough shaking, of at least two minutes, it is ready to use! The coverage will be approximately 1100 square inches per can. If a medium, even coating is used, the coverage area can be maximized.
The Process; Spray Can
Step 1:
Start with a clean, uncoated metal. Remove any oil or grease with denatured alcohol.
Step 2:
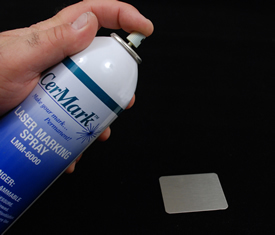
Thoroughly shake the CerMark Spray for approx two minutes. You want to hear the metal ball mixing the solution for a good 60 seconds before applying. The metal ball in the spray can helps to active ingredients that will settle to the bottom of the container.
Step 3:
Apply in a smooth fluid motion a light coating of the CerMark Spray. You need just enough to cover your metal. It is better to apply a light to medium and consistent coat rather than a thick and heavy coat.
Step 4:
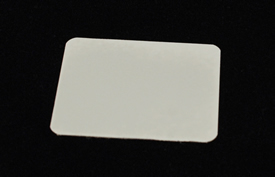
Allow 15 - 20 minutes for the coating on the metal to air dry. Once dry, the CerMark is dry, it will turn a light tan color. Be patient and allow it to dry fully or the bonding process will not work properly.
Step 5:
For engraving, ALWAYS use 100% power. Use a speed setting equivalent to your laser's rated power. For example, if you have a 25-watt laser system, use a speed of 25%. If you have a 50-watt system, use a speed of 50%. If you find the CerMark not adhering keep lowering the speed. Do not go below 5%.
Step 6:
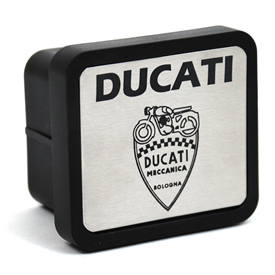
After engraving, wash the unused coating off of the metal using water. A soft brush or paper towels help to speed the cleaning process.
Step 7:
After engraving, you will want to make sure you store your CerMark Spray can properly. This will help prolong the shelf life of your CerMark Spray.
CerMark Tape
Out of the three formats, the CerMark Tape will be the format that allows for the best precision. With the tape you are not at the mercy of brush bristles or the over spray of a nozzle. This may be the most expensive of the three, but less product will be lost due to errors. Also, there is no clean up after engraving as with the spray and brush-on methods
The tape has a semi-adhesive backing so it can be re-positioned if necessary. The roll of tape is 50 yards long and comes in widths of 1", 2", and 4". Due to the thickness of the tape a laser must power through the adhesive and the CerMark coating. For this reason, it is recommended that a 40-watt laser be the minimum used for tape engraving. CerMark tape works best on flat, uncoated metals. Stainless steel is the ideal substrate for this process.
The Process; Tape
Step 1:
Start with a clean, uncoated metal. Remove any oil or grease with denatured alcohol.
Step 2:
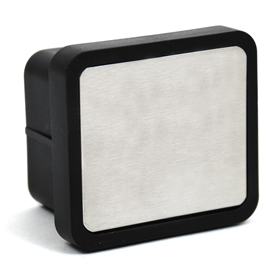
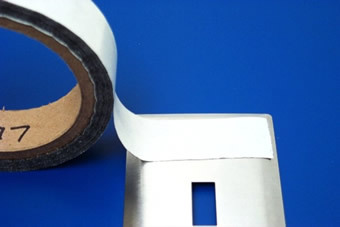
Apply the tape, black side facing the metal. Press firmly to make sure the tape is free of bubbles and in direct contact with the metal.
Step 3:
Engrave the CerMark tape using a power setting of 100% and a speed setting that is 1/3 of your setting for the spray or brush-on CerMark. For example, if you use 30% speed for the spray or brush-on, then use a speed setting of 10% for the tape. Some slight flaming might occur and this is normal as the laser powers through the adhesive.
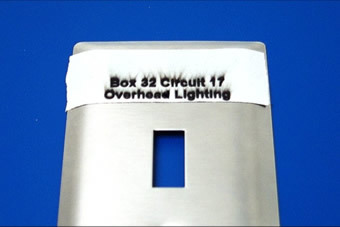
Step 4:
After engraving remove the tape and clean the engraved area with a damp cloth or water. If needed, clean with denatured alcohol.
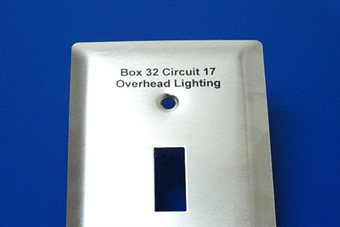
Which Method to Use
Below are some examples of a product that may work best with each method of metal marking.
CerMark Solution: Good for applying to a specific area. Brushing allows a more precise application and keeps the liquid from being applied to areas that may be difficult from which to remove it.
CerMark Spray Can: Good for areas needing larger coverage. Spraying covers quickly and evenly.
CerMark Tape: Good for small, flat surfaces. The tape is the easiest and quickest method.


