CerMark for Tile & Glass | Resources
Welcome to the JPPlus Resource Center!
Your resource for support for: Engraving | Sublimation | Toner Heat-Transfer | UV-LED & more!
Tile & Glass Marking Basics
The great thing about working with CerMark Tile & Glass solution on glass or tile is that is creates a black engraving that is easily visible and adds detail to the plain substrates.
Thermal bonding is a process that has been proven for many years for the application of metal marking. The heat energy of the laser is used to bond the special coating to the base material. Advances in material development now offer the ability to bond on glass or ceramic tile of any type or surface.
The Tile & Glass Marking Solution can be used on glass or any type of ceramic or porcelain tile, making it a very versatile and useful product in your production setting. The CerMark Tile & Glass Marking solution is ready to use but MUST be shaken thoroughly. Pour the solution into a spraying device such as the Spray Tool Kit as the CerMark Tile & Glass Solution is not able to be brushed on to the tile or glass.
As with all CerMark products make sure you have a good size area to work in and cardboard to lay down to catch unintentional over spray. For the solution, engrave text, logos or photographs using 100 power and a speed setting that is 70% of the rated power of your laser. For instance, multiply the rated power by .7 - 35 watts x .7 = 24 speed setting. Using a lower dpi setting of 400 or 300 will produce uniform results with shorter engraving times.
Tile & Glass Marking Spray Can
Just as with the CerMark Metal Marking spray, the CerMark Tile & Glass Spray is ready to use right out of the can. Just shake the can thoroughly for approx 2 minutes allowing the metal ball to activate any solution that may have settled toward the bottom of the spray can. Soak the nozzle in denatured alcohol when not in use. The storage for the CerMark Tile & Glass is the same as the CerMark Metal Marking Solution in the video below.
Suggested General Settings for the CerMark Tile & Glass Spray Can
(Actual settings will vary by laser wattage as well as thickness of material)
50 watt system
- Tile > 100 power/70 speed - 500/600 dpi
- Glass > 100 power/55 speed - 500/600 dpi
35 watt system
- Tile > 100 power/50 speed - 500/600 dpi
- Glass > 100 power/35 speed - 500/600 dpi
The Process, CerMark Tile & Glass Spray Can
Step 1:
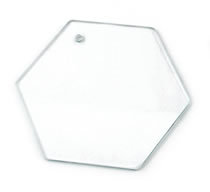
Start with a clean glass. Remove any oil or grease with denatured alcohol.

Step 2:
Thoroughly shake the CerMark Spray for approx two minutes or mix the solution well before applying. The shaking and mixing help to active ingredients that will settle to the bottom of the container.
Step 3:
Apply in a smooth fluid motion a light coating of the CerMark Spray. You need just enough to cover your substrate. It is better to apply a light to medium and consistent coat rather than a thick and heavy coat.
Step 4:
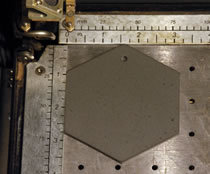
Allow 15 - 20 minutes for the coating on the substrate to air dry. Once dry, the CerMark will turn a dark grey color. Be patient and allow it to dry fully or the bonding process will not work properly.

Step 5:
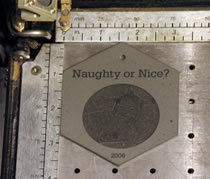
For the solution, Engrave text, logos or photographs using 100 power and a speed setting that is 70% of the rated power of your laser. For instance, multiply the rated power by .7 - 35 watts x .7 = 24 speed setting. Using a lower dpi setting of 400 or 300 will produce uniform results with shorter engraving times. For the spray, use the settings grid given above.

Step 6:
After engraving, clean the engraved area with a damp cloth or water. To remove the un-engraved CerMark, lightly buff with a Scotch Brite pad until the rough texture is gone.
Look on the reverse side of the engraving. Did the glass engrave too? If so, the power was too high. The goal is to adhere the CerMark to the glass - not to engrave the glass.

The processes for using CerMark Tile & Glass solution on tile is identical. In addition, using the color versions (blue or bronze) are also the same.

